Table des matières
XBee - Star
- Author: Jérôme Abel (Reso-nance)
- Date: 09/2014
- License: GNU/FDL3
- Files: codes.zip
- Thanks to: Martin Peach, Hans-Christop Steiner, Vincent Pillet
Xbee modules are used to transmit wireless data (radio waves). If you don't know anything about that and you are brave, you should follow a tutorial or mine but it is in French : Xbee & Arduino.
On the last tutorial we've seen how to make a “point-to-point” network, instead of wires. One Xbee talk to another one. Now, I focus on the star network topology wich allows two setups : one emitter (coordinator) send data to few receivers (End Devices) ; and in return, few emitters send data to one receiver. This article describe how to do this with XBee Series 1, Pure Data and Arduino. Some of my art projects (Patatas de goma and Chimères Orchestra) will use this technique.
Pre-requities
- Basics of Pure Data, Arduino
- Basics of Serial Communication (in French)
- Basics of Xbee & Arduino (in French)
Materials
Used for tests:
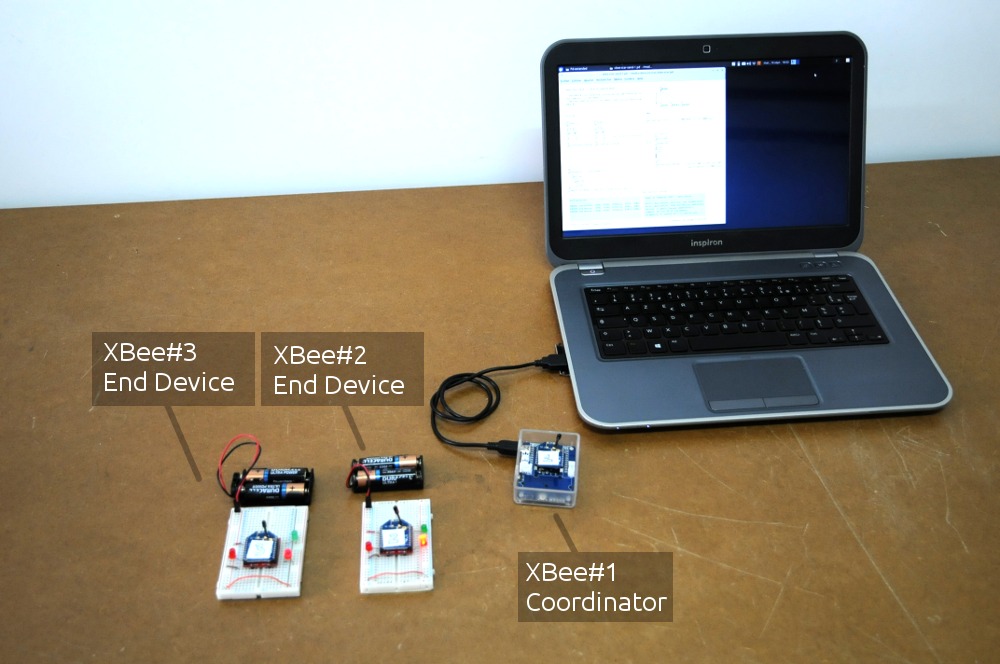
- 3 XBee series 1 + 3 mini-boards
- 3 Arduinos
- 2 Serial converter ou XBee explorers
- 3 Breadboards
- 4 Leds
- 2 Battery couplers 1,5V AAA + 4 batteries
- Jumper wires
Softwares
To install:
- Pure Data Extended, which contains [mrpeach/packxbee] and [mrpeach/unpackxbee]
- xbeeterminal.zip (made in processing), to setup XBee
Resources
- XBee Datasheet : xbee_product_manual.pdf
- XBee Arduino : XBeeAPIsTutorial, XBee Arduino Developers Guide etXBee series 2 quick reference guide
- XBee Pure Data : xbee_io_reader.pat et lists.puredata.info
Precautions
Some precautions et common mistakes :
- XBee modules are powered about 3V, the 3,3V of the Arduino are perfect or two 1.5V batteries. Be careful to not power it with the 5V of the Arduino.
- RX/TX : be careful of the direction, the RX is linked to TX and TX is linked to the RX.
- RX/TX : take out RX/TX wires branchés à l'Arduino quand vous téléversez le code vers l'Arduino
- Be really careful with the baudrate of the serial communication and the port number which gonna change when you use another Arduino board. If you change the baudrate, you need to change it everywhere, in xbeeSerialTerminal, Pure Data ([comport .. ….]), Arduino (Serial.begin(….)) and in the serial monitor of Arduino. Sometimes, when you can not communicate with your XBee, the reason could be that the baudrate is diffrent.
- Leonardo : use Serial1 instead of Serial : Serial1.begin(9600); xbee.setSerial(Serial1);
Trick
If you open twice the Arduino software, you can upload codes into two different Arduinos. It avoids change the board name each time.
1/ To XBee (direct)
The first example is to control directly digital and pwm outputs of XBees with Pure Data, without Arduino. We connect LEDs on the D0 (digital) and PW1 (PWM) pins of the XBee.
Schematic : Pd/AT/SERIAL/XBEE1 —> XBEE2/LEDS, XBEE3/LEDS, …
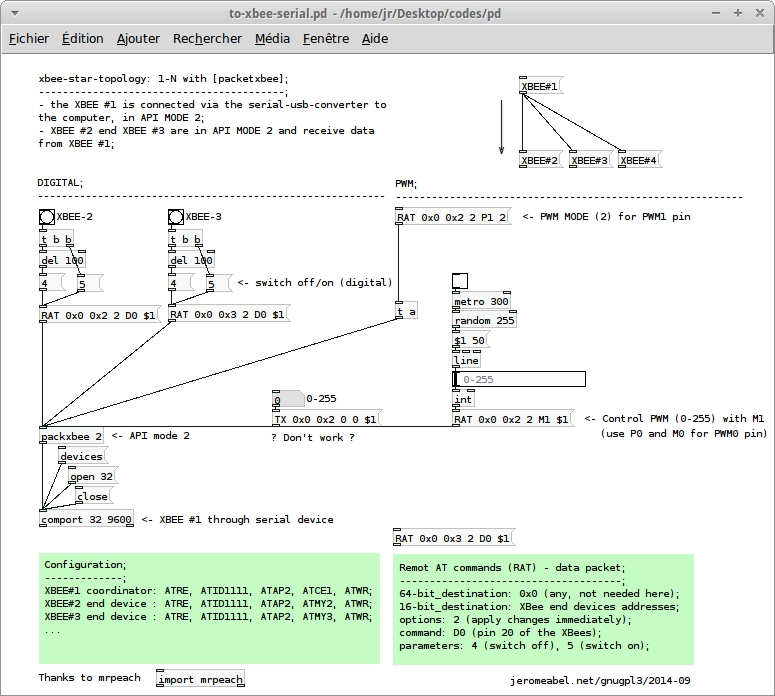
Code : to-xbee-star.pd
Configuration
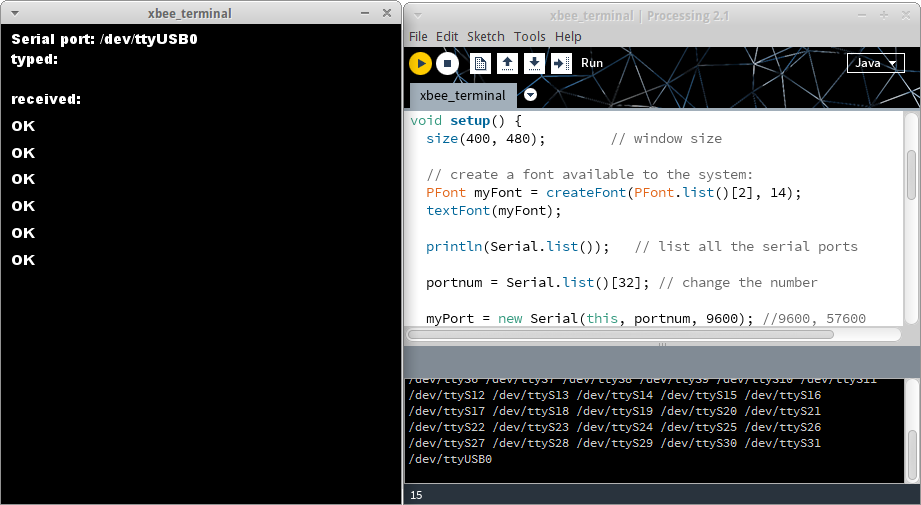
Open the xBeeSerialTerminal with Processing and setup XBees :
- XBEE#1 Coordinator: ATRE, ATID1111, ATAP2, ATCE1, ATWR
- XBEE#2 End Device : ATRE, ATID1111, ATMY2, ATWR
- XBEE#3 End Device : ATRE, ATID1111, ATMY3, ATWR
The main difference between last setups is that we do not write the destination address. The address is part if the message sended by Pure Data to the coordinator. It is because we use the API mode (ATAP2). See appendices at the bottom to know more.
Explanations
| AT Command | Description |
|---|---|
| ATRE | Come back to the default settings |
| ATID1111 | Network address |
| ATAP2 | Coordinator is in API mode |
| ATCE1 | Coordinator behavior |
| ATMY2 | Addresses of end devices |
| ATWR | Write the settings |
Notes :
| ATAP2 | By default : API mode is not necessary for End Devices |
| ATMY0 | By default : coordinator addres is 0 by default |
| ATAP0 | By default : AT for the End Devices |
| ATCE0 | By default : End Device behavior |
| ATDH0 | By default : 16 bits addresses |
| ATDL0 | By default : Destination addresse |
| ATIU0 | ? : if we not use RX/TX in our case (direct) |
| ATMY1 | ? : if the coordinator address is 1, we avoid send useless data to it |
Pure Data
Explanations
| AT Command | Description |
|---|---|
| RAT 0x0 0x2 2 D0 4 | digital switch off |
| RAT 0x0 0x2 2 D0 5 | digital switch on |
| RAT 0x0 0x3 2 P1 2 | PWM mode (2) for PWM1 pin |
| RAT 0x0 0x3 2 M1 $1 | Control PWM (0-255) with M1 (use P0 and M0 for PWM0 pin) |
Remote AT commands (RAT)
| 64-bit_destination | 0x0 (any, not needed here) |
| 16-bit_destination: | XBee end devices addresses |
| options | 2 (apply changes immediately) |
| command | D0 (pin 20 of the XBees) |
| parameters | 4 (switch off), 5 (switch on) |
2/ Packets monitoring
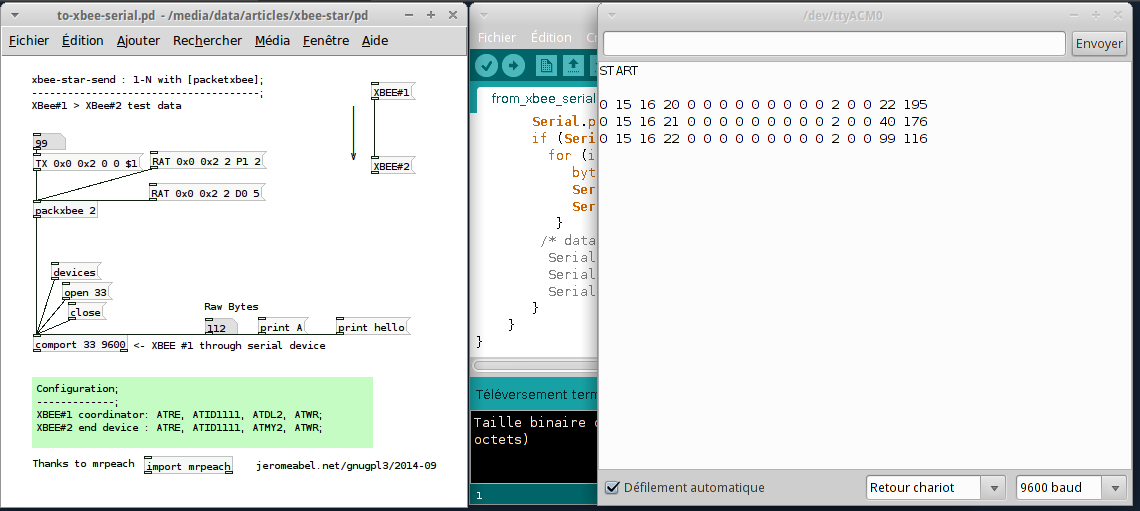
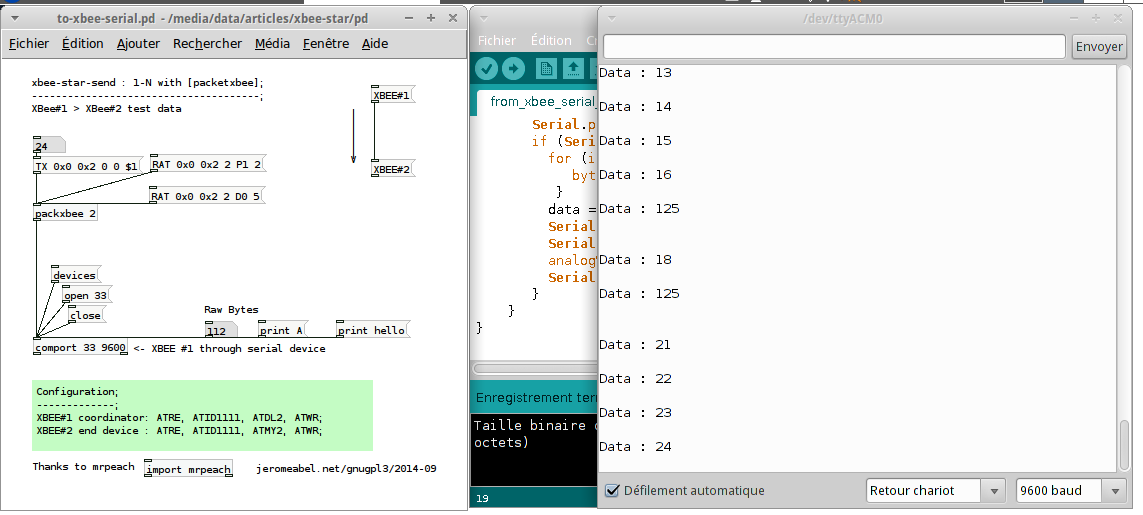
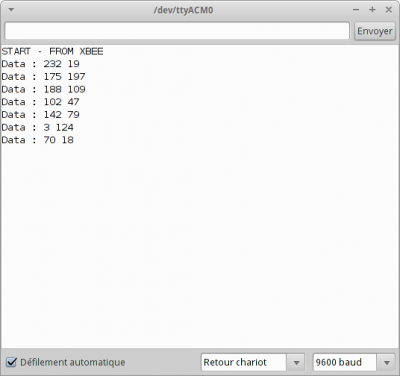
We can understand what is in Xbee packets with serial monitoring.
Schematic : Pd/SERIAL/XBEE1 —> XBEE2/RX/ARDUINO
Fichiers : to-xbee-serial.pd, from_serial.ino, from_xbee_serial.ino (get packet), from_xbee_serial_2.ino (get one data)
Note : when I use simply the serial converter without Arduino, I catch nothing… I don't understand.
Configuration
- XBEE#1 Coordinator: ATRE, ATID1111, ATDL2, ATWR
- XBEE#2 End Device : ATRE, ATID1111, ATMY2, ATWR
Results
| Data | Results |
|---|---|
| Whatever numbers | Ok, the range is 0-255 (byte) |
| print A | 65 |
| print hello | 104 101 108 108 111 |
| RAT 0x0 0x2 2 D0 5 | 126 0 16 23 23 0 0 0 0 0 0 0 0 0 2 2 68 48 5 84 |
| TX 0x0 0x2 0 0 120 | 126 0 15 16 24 0 0 0 0 0 0 0 0 0 2 0 0 120 93 |
| TX 0x0 0x2 0 0 10 11 12 13 14 15 | 126 0 125 51 16 30 0 0 0 0 0 0 0 0 0 2 0 0 10 11 12 13 14 15 145 |
Get a data (parser)
3/ XBee API - Arduino
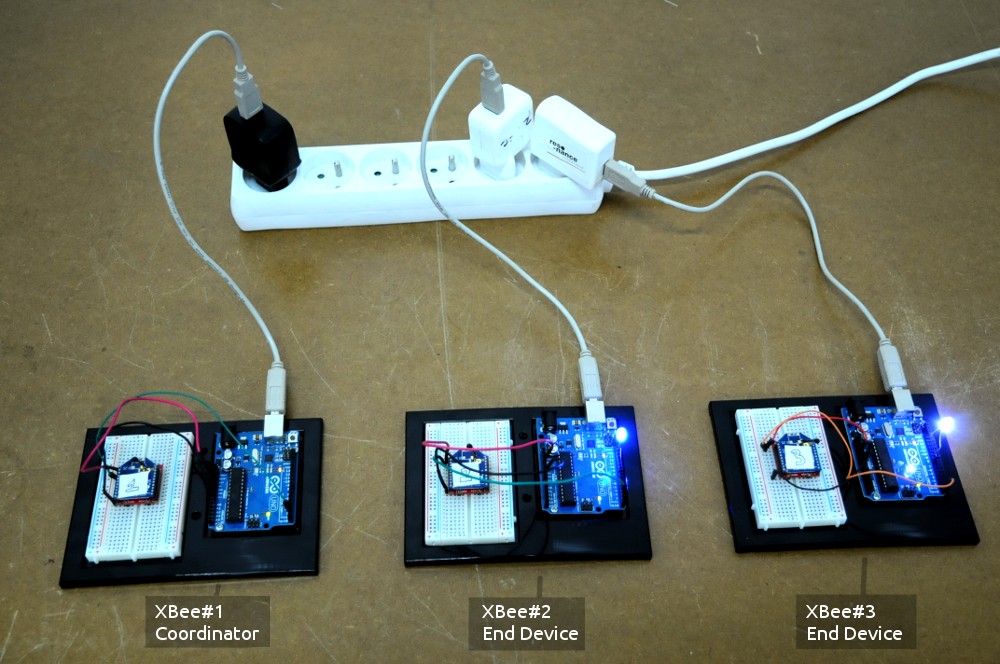
One Arduino send data to two other to understand how to send and receive Xbee packets. We wire a LED to pin 9 of each End Devices Arduinos to see what it is happen.
Schematic : ARDUINO/TX/XBEE1 —> XBEE2/RX/ARDUINO/LED et XBEE3/RX/ARDUINO/LED
Codes : to_xbee_api.ino, from_xbee_api.ino
Configuration
- XBEE#1 Coordinator: ATRE, ATID1111, ATAP2, ATCE1, ATWR
- XBEE#2 End Device : ATRE, ATID1111, ATAP2, ATMY2, ATWR
- XBEE#3 End Device : ATRE, ATID1111, ATAP2, ATMY3, ATWR
Results
4/ XBee API - Arduino and Pure Data
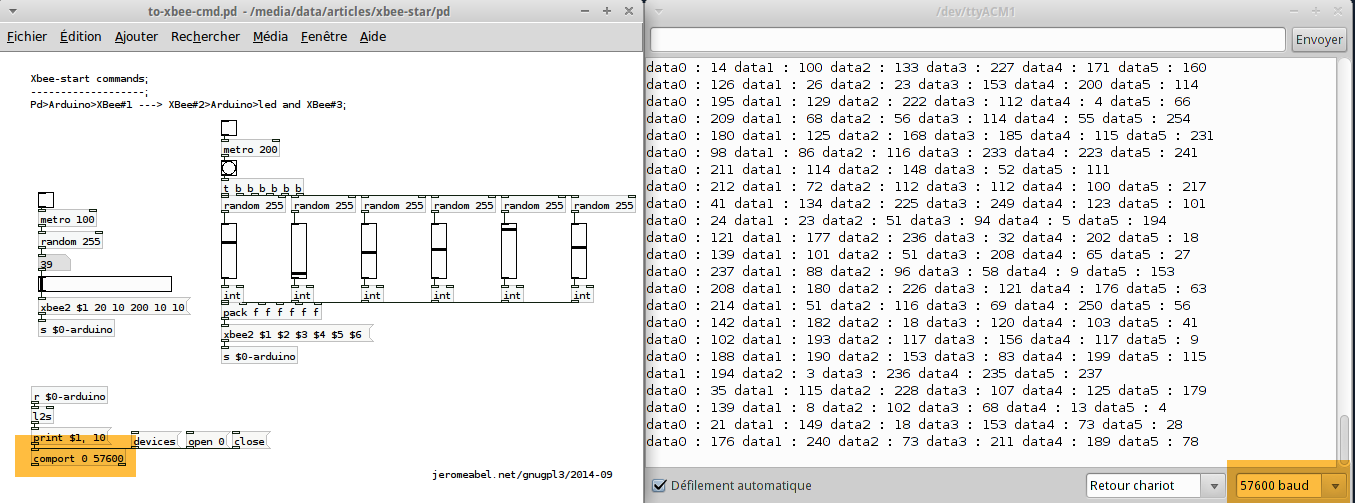
To use Pure Data and send Xbee packet, I had no success in using only a serial converter. I needed use an Arduino to make real XBee packets for the receivers. I use the SerialCommand library in Arduino to parse 6 data from Pure Data (a list). These data are formatted by Arduino and the XBee library. Receivers get only the good data from the packet. The LED is connected to the pin 9 to see what it's going on.
Schematic : Pd/CMD/ARDUINO/XBEE1 —> XBEE2/RX/ARDUINO/LED et XBEE3/RX/ARDUINO/LED
Codes : to-xbee-cmd.pd, to_xbee_api_cmd.ino, from_xbee_cmd.ino
Configuration
- XBEE#1 Coordinator: ATRE, ATID1111, ATAP2, ATCE1, ATBD6, ATWR
- XBEE#2 End Device : ATRE, ATID1111, ATAP2, ATMY2, ATBD6, ATWR
- XBEE#3 End Device : ATRE, ATID1111, ATAP2, ATMY3, ATBD6, ATWR
Baudrate changes : you need to change it everywhere (Pure Data, Arduino, xbeeTerminal, serial monitor).
Pure Data
4/ Data receptions (direct)
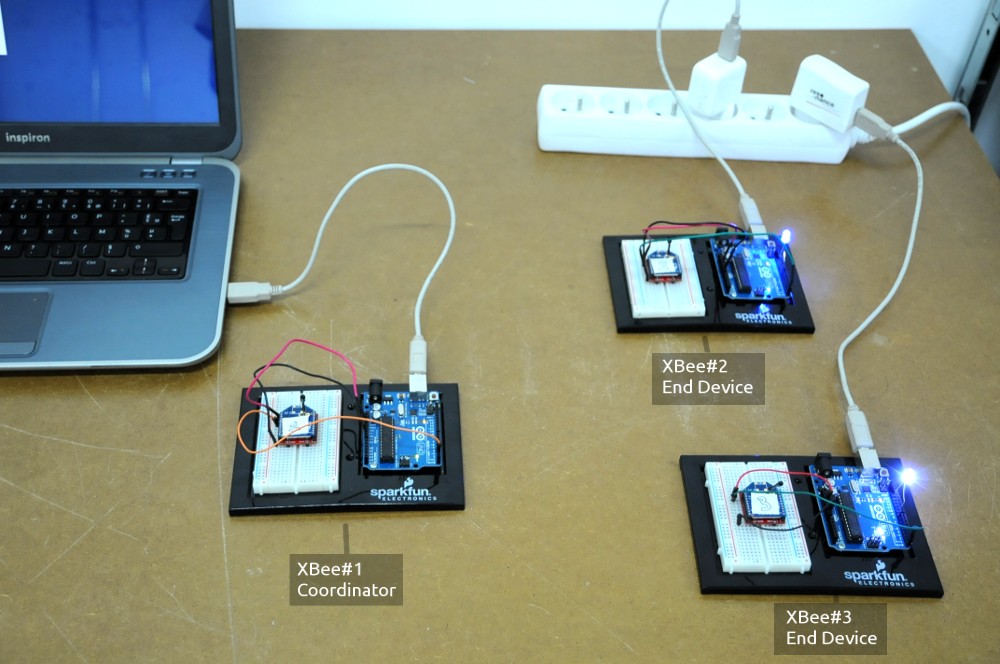
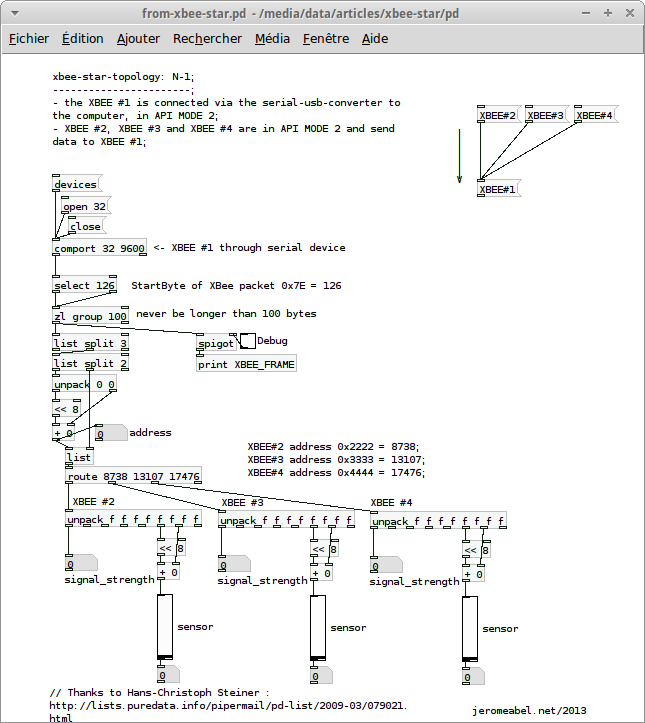
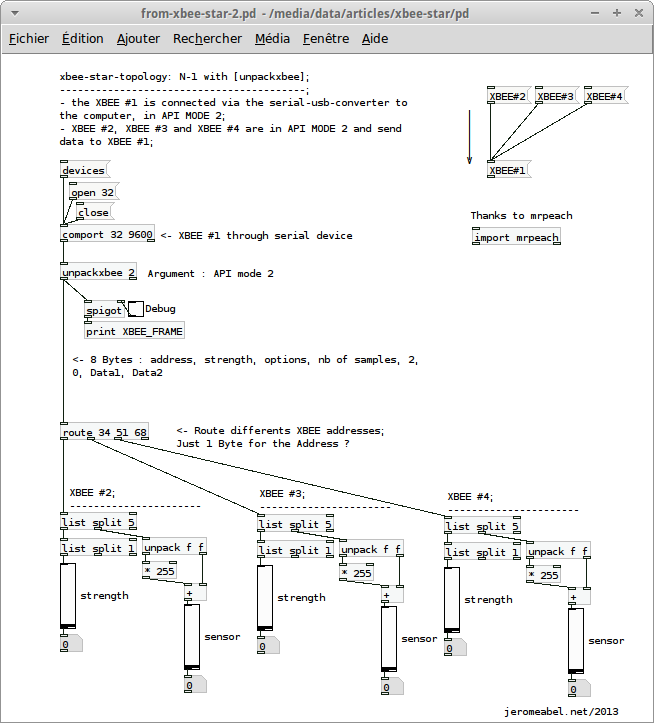
The coordinator get data directly from sensors connected to XBee senders whithout Arduinos, with Pure Data or Processing. Very useful to get data from a network of sensors.
Schematic : SENSOR/XBEE2 et SENSOR/XBEE3 (only) —> SERIAL/XBEE1
Codes : from-xbee-star-1.pd, from-xbee-star-2.pd
Configuration
- XBEE#1 Coordinator: ATRE, ATID1111, ATAP2, ATMY1, ATWR
- XBEE#2 End Device : ATRE, ATID1111, ATAP2, ATMY2222, ATDL1, ATWR
- XBEE#3 End Device : ATRE, ATID1111, ATAP2, ATMY3333, ATDL1, ATWR
Les adresses des destinataires doivent être celles du coordinateur.
Pure Data
Processing
Appendices
API
In AT Command mode (Transparent Mode) , everything got in RX of XBee will be sent out via antenna , the incoming data from antenna will go to TX. But in API Mode , it won't send out anything until it received the correct form of commands from serial interface. (xbee introduction)
Data Structure in API Mode:
7E 00 0A 01 01 50 01 00 48 65 6C 6C 6F B8
| 7E | Start delimiter |
| 00 0A | Length bytes |
| 01 | API identifier |
| 01 | API frame ID |
| 50 01 | Destination address low |
| 00 | Option byte |
| 48 65 6C 6C 6F | Data packet(ASCII: “Hello”) |
| B8 | Checksum |
Series 1 radios support both AT and API modes with a single firmware version, allowing you switch between the modes with X-CTU. However, Series 2 requires a specific firmware for API mode. As of now there are two firmware versions for Series 2 API mode: ZNet and ZB Pro. ZNet is recommended as it is the easiest to work with.
What is API (Application Programming Interface) Mode and how does it work? (digi.com)
API (Application Programming Interface) mode is a frame-based method for sending and receiving data to and from a radio's serial UART. The API is an alternative to the default transparent mode.
The API allows the programmer the ability to:
- Change parameters without entering command mode (XBee only)
- View RSSI and source address on a packet by packet basis
- Receive packet delivery confirmation on every transmitted packet
XBee product manual :
The API operation option facilitates many operations such as the examples cited below:
- Transmitting data to multiple destinations without entering Command Mode
- Receive success/failure status of each transmitted RF packet
- Identify the source address of each received packet
Broadcast / Unicast
To send data to few modules, another way would be to send messages to everyone (broadcast). Then the receivers parse data to get only what they want. I think the API mode seems to be “The” way to achieve that. In real, the message is physically send throuh air (radio waves) like a broadcast. XBee modules seems manage data to know which data are the good ones, etc.
Series 2 (forum.sparkfun.com) :
Transmitting data using broadcast addressing with XBee ZB modules will generally give you much, much less performance than transmitting an individual unicast to each node you want to talk to. This is because broadcasting works very differently on the XBee ZB modules than with the XBee 802.15.4 modules.
Series 1 (forum.sparkfun.com, electronics.stackexchange.com) :
If you don't want to use API, and strictly want to use AT mode, then I suggest you simply put a destination prefix string at the beginning of each of your messages, and then broadcast all messages to all end-nodes. On the receiving end-nodes, write some code to check whether the destination prefix string of a received message matches that particular end-node's address/name (which you can assign randomly yourself in code). I don't think it's a good idea to change ATDL dynamically for each message. Not only might it affect the timing and require re-pairing but also remember that ATDL is written to the Xbee's EEPROM – which only allows a finite number of rewrites.

